Free Knitting Pattern
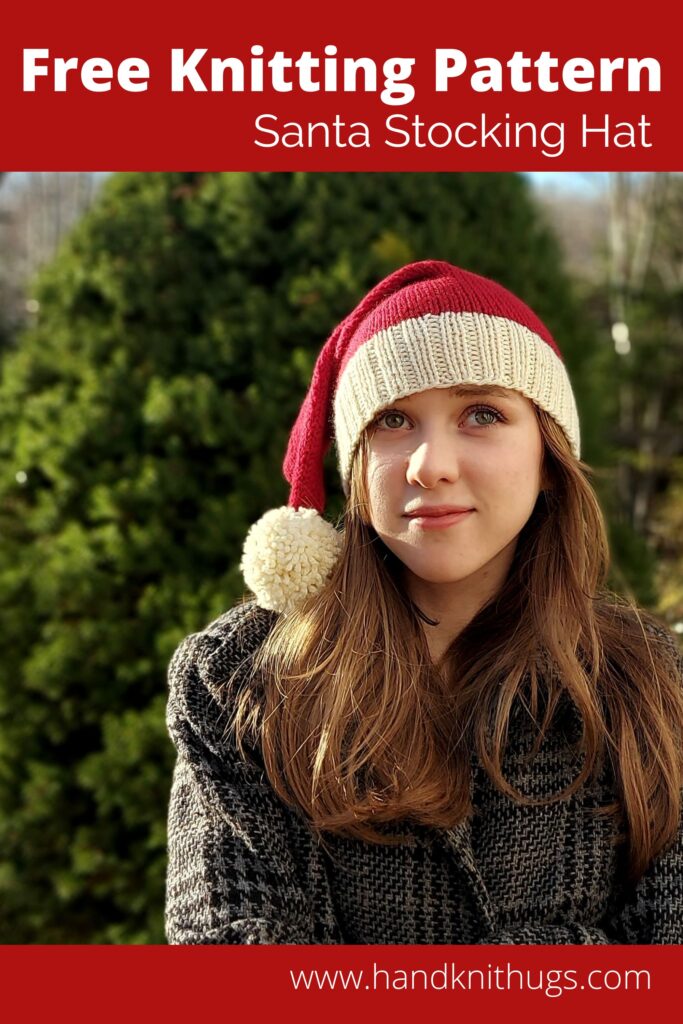
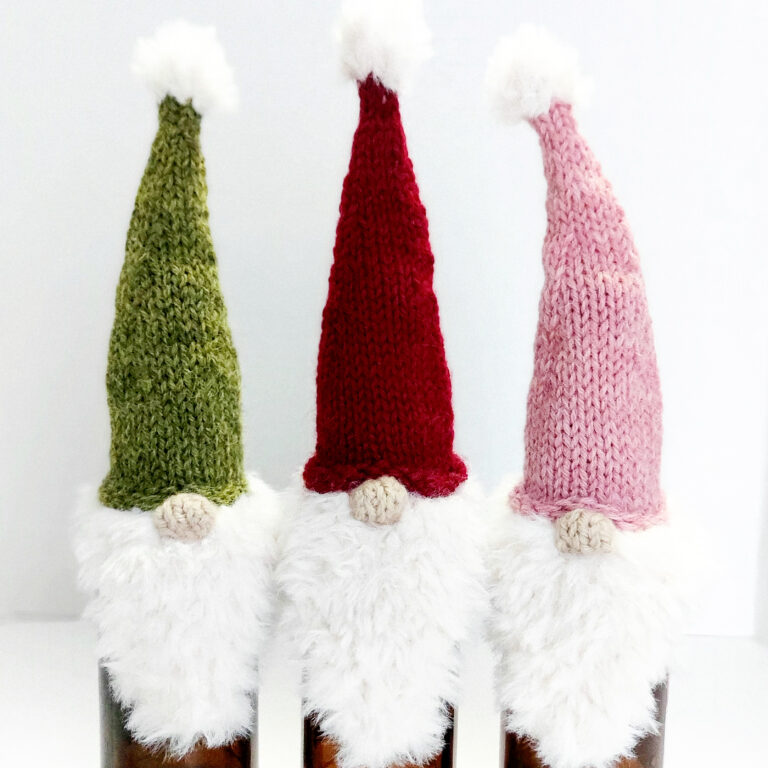
It’s never too early to start working on your Holiday knits and everyone will love these classic knit Santa stocking hats. They are perfect for all of your family gatherings this Christmas.
Affiliate Statement: Hey Readers, the following post contains affiliate links. I may receive a small commission if you click and purchase from one of these links (which honestly, I’ll probably use to buy more yarn and design more awesome patterns to share with you). I only recommend products that I already use and love, thank you so much for your support.
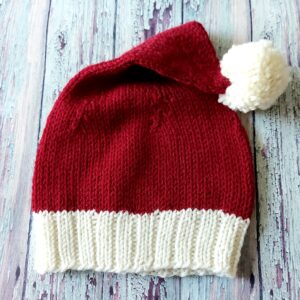
The classic knit Santa Hat is simple and beautiful with a ribbed hem and a pompom at the perfect length. The shaping at the crown allows for a nice fold at the top at the head that isn’t too bulky. It knits up fairly quickly in a soft and cozy wool that is warm, comfortable and made to last. Perfect for holiday photos, family Christmas cards and events for years to come.
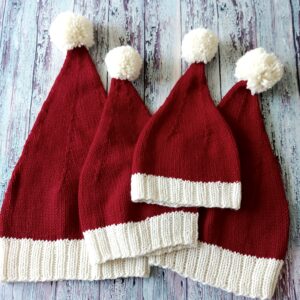
Instructions are written up in sizes for the whole family. The shape of the stocking hat allows for one size to fit many. Measurements are listed below.
I used my favourite red from the Cascade 220 colours. It is called Ruby (link in the yarn section below) and it is a deep cranberry shade that is perfect for Christmas. I matched with Natural, an off-white colour which creates a beautiful contrast, it makes the red really pop.

The same yarn is used for my Square Santa Hat pattern made with two pompoms. You can mix and match these hats for some fun variety in your family holiday photos.
The Pattern
Yarn
Cascade 220 solids highland wool (worsted weight 4-medium) you can find this yarn at Love Crafts (see the affiliate statement above)
CC (Contrast Colour): Natural – approximately 33 (44, 55, 66) yards / 30 (40, 50, 60) meters
MC (main Colour): Ruby – approximately 83 (101, 114, 157) yards / 76 (92, 104, 144) meters
Needles and Tools
US7 (4.5 mm) 16″ circular needle
US8 (5.0 mm) 16″ circular needle
US8 (5.0 mm) double point needles
Stitch Marker
Darning Needle
Pompom maker: Clover medium 2.5″ (6.5cm) for kids and toddler sizes and large 3.38″ (8.5cm) for kids and adult sizes
Gauge
4″ = 18 stitches in stocking stitch using US8 (5 mm) needles
Sizes
The shape of stocking hats allow for one size to fit many
Baby 0-12 months: 14-16″ circumference, 12.5″ length
Toddler and Kids Small: 17-19″ circumference, 14.5″ length
Kids: 19-21″ circumference, 17″ length
Adult: 21-23″ circumference, 18″ length
Abbreviations
CC – Contrast Colour
CO – Cast on
DPNs – Double Point Needles
K2tog – Decrease 1 by knitting the next two stitches together
M1 (M1L) – Increase 1 by picking up and knitting a new stitch in the leg of the next stitch on the left hand needle.
MC – Main Colour

Instructions
With US7 (4.5mm) circular needle, CO 54 (63, 72, 81) stitches in CC (white)
Place stitch marker and join the round
Work 11 (12, 13, 14) rounds of K2, P1 ribbing
Switch to MC (red)
Switch to US8 (5mm) circular needle
Increase Round: [K8, M1, K1] repeat to end
Knit 16 (17, 18, 19) rounds
Begin Decrease Rounds – switch to DPNs when needed
Next Round: [K10 (12, 14, 16), K2tog] repeat to end
Next Round: [K9 (11, 13, 15). K2tog] repeat to end
Next Round: Knit
Next Round: [K8 (10, 12, 14). K2tog] repeat to end
Next two Rounds: Knit
Next Round: [K7 (9, 11, 13). K2tog] repeat to end
Next three Rounds: Knit
Next Round: [K6 (8, 10, 12). K2tog] repeat to end
Continue working three knit rounds and then a decrease round, subtracting one from the number of stitches to knit before the K2tog, until 10 stitches remain
Knit three more rounds
Cut yarn and run through remaining 10 stitches
Finishing
Wash and shape the hat
Make a pompom in CC. I use 2.5” (6.5cm) for the baby / toddler sizes and 3.38” (8.5cm) for kids / adult sizes. Wrap the pom tool about 120 times per side for a nice, full pompom. Tip: If you have 2 balls in the same colour you can double strand it to go faster. Make your pompom fluffy! If you are using wool, mist it with water then throw it in the dryer for 3-5 minutes.
Attach the pompom securely to the top of the hat by running the tie yarn strands into opposite sides of the hat 2 rows down from the tip with a darning needle. Double knot on the inside then run the strands back through into the pompom.
Enjoy! Happy Holidays Everyone
© 2023 Heather Pelletier – Handknit Hugs
This pattern is for personal, non-commercial use only.
Do not copy, re-distribute or sell this pattern either in whole or in part.
You may sell products made from this pattern – credit would be appreciated.

Thank you so much for checking out this pattern, I hope you have enjoyed it. If you want to support me all you have to do is share. Please comment at the bottom of this post if you have any questions or feedback. I would love to see your finished Santa hats, share your project on Ravelry or post a photo on Instagram and tag @handknithugs