Free Knitting Pattern
Hi Everyone! Happy Holidays!! I written up this quick and fun knitting pattern to show my appreciation to all of you this year. I have been blown away by all of the support, positive feedback and sharing of patterns through Instagram, Facebook. Pinterest and Ravelry. Thanks so much for helping my little knitting blog blossom 2023.
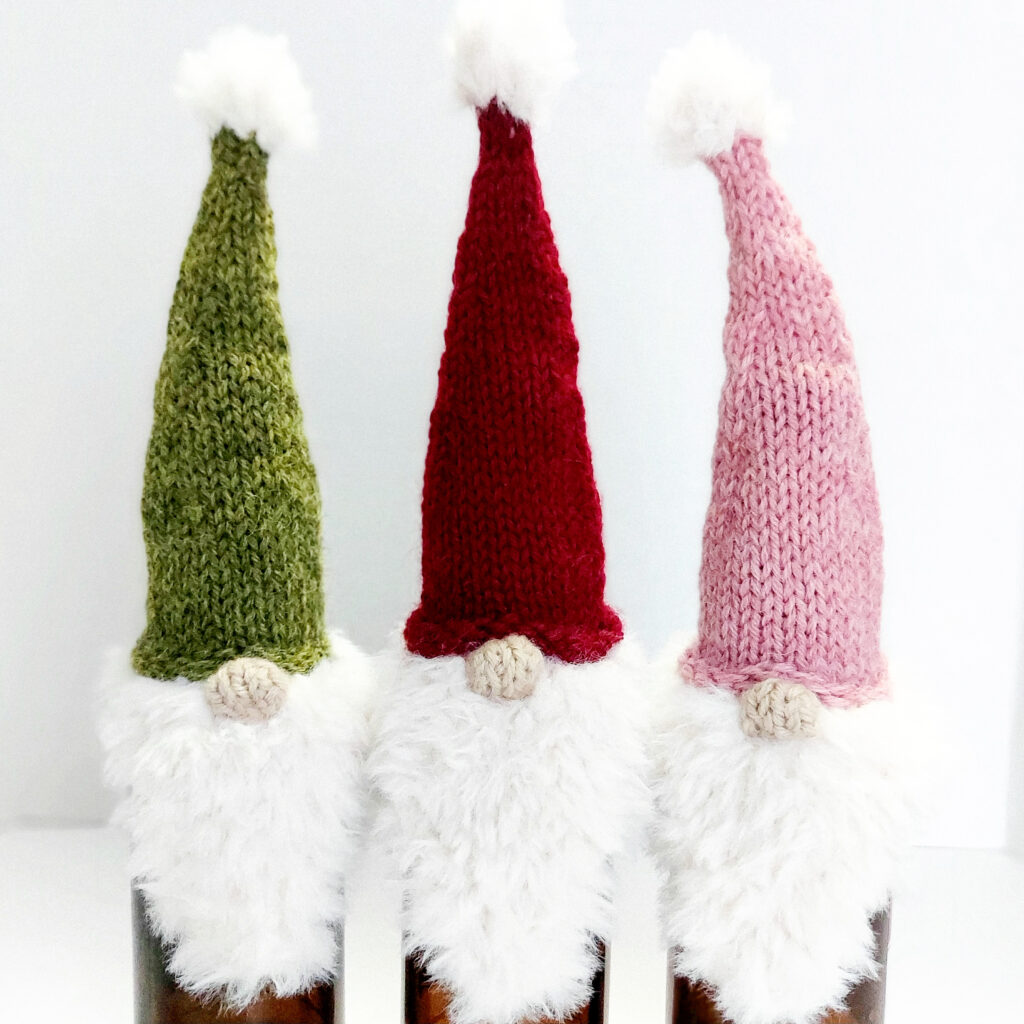
I know, I am very late getting this pattern out but your are crafty and what’s Christmas without some last minute making? These little bottle toppers are an awesome gift to throw on top of that wine, bottle of booze, or craft beer that you are gifting this year. These knit up SUPER fast, I promise! They are worked in one piece from the bottom of the beard all the way up top, nose and pompom included. And I’ve only used one needle size to keep it simple. Once you get going you should be able to knit up a bunch of these in an afternoon or evening.
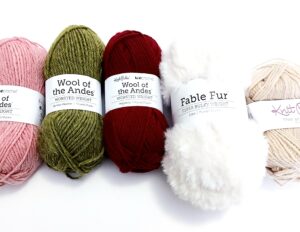
Do you have any of that awesome faux fur yarn left over from your santa hats? You’ll need only a small amount along with some worsted weight wool in your hat colour and a tiny bit in the nose colour. I made my hats in red, pink and green. I used beige for my Santa noses but these will also look great in a peach, tan or brown. I used KnitPicks Fable Fur and Wool of the Andes though most faux fur yarns and worsted weight wools should work for you.
Here is the pattern, I hope you enjoy knitting these up! Share your finished bottle toppers on Insta and Ravelry, I would love to see them.
The Pattern
Yarn
Fur Yarn – KnitPicks Fable Fur in Eisbar (white)
HC (hat colour) – KnitPicks Wool of the Andes in Bamboo Heather (green), Hollyberry (red), and Blossom Heather(Pink)
NC (nose colour) – KnitPicks Wool of the Andes in Oyster Heather
Needles and Tools
US8 (5.0mm) Double Point Needles (DPNs)
Optional: You can size up to US10.5 (6.5mm) for the faux fur if you prefer. You might find it easier to work the stitches and will get a longer beard.
Darning Needle
Gauge
4″ = 18 stitches and 22 rows for the stocking stitch in the hat. This is the only place gauge matters because you want it to fit nicely over your bottle
Size
10.5″ tall from beard to pompom
6″ circumference at the base of the hat
Abbreviations
CO – Cast On
HC – Hat Colour
K2tog – Decrease 1 by knitting the next 2 stitches together
KFB – Increase 1 by knitting into the front and back of the next stitch
NC – Nose Colour
P2tog – Decrease 1 by purling the next 2 stitches together
PFB – Increase 1 by purling into the front and back of the next stitch
PFBFB – Increase 3 by purling 4 stitches into the next stitch (front, back, front back)
SSP – Decrease 1 by slipping the next 2 stitches knitwise, place them back on the left needle and purl them together

Instructions
CO 3 in Fable Fur with US8 (5.0mm) DPN
Work back and forth in rows for this part
Row 1: knit
Row 2: purl
Row 3: KFB, K1, KFB
Row 4: purl
Row 5: knit
Row 6: purl
Row 7: KFB, K3, KFB
Row 8: purl
Row 9: knit
Row 10: purl
Row 11: KFB, K5, KFB
Row 12: purl
Turn and Cast On 9 stitches (18 stitches total)
Split these stitches across 3 DPNs (6 each) and join the round
Round 1: Knit
Cut Fur Yarn and switch to HC (hat colour) and have NC (nose colour) ready for the next round
Note: when adding the nose booble make sure the NC tail yarns, start and end, are approximately 5” long for finishing steps later
Round 2 (add nose bobble): K4 with HC, K1 with NC, turn,
purl 4 stitches into NC stitch (PFBFB), turn,
K4, turn,
PFB, P2, PFB, turn
K6, turn
SSP, P2, P2tog, turn
K4, turn
SSP, P2tog, slip 1st NC stitch over 2nd NC stitch, turn
Switch back to HC (hat colour), knit the NC stitch and the knit rest of the round
Rounds 3-4: purl
Round 5 (Increase): [K2, KFB] repeat to end (24 stitches total – 8 on each needle)
Knit 11 rounds (total 12 rounds of stocking stitch)
Optional – Shift stitches: Knit the first two stitches of the round onto the last needle, go around and shift two stitches from the beginning of each needle onto the end of the previous needle so there are 8 stitches on each needle again. This will better center your decreases over Santa.
Begin Decrease rounds
Next Round: [Knit to the last 2 stitches on needle, K2tog] repeat to end
Next 3 Rounds: Knit
Repeat the last 4 rounds until 6 stitches remain, ending with 3 knit rounds
Cut red and switch to fur
Knit 3 rounds
Cut fur and run yarn through remaining stitches with a darning needle. Run yarn through the center
Finishing
Nose: Use the tail ends of the nose bobble and a darning needle to straighten the nose and close gaps on the sides. Cut loose ends to about an inch and push into the center of the nose with your darning needle for stuffing
Use the tail of the Fur Yarn to close any gap in the join round
Weave in remaining loose ends and trim. It’s a little tricky with the fur, feel for stitches to weave into, you only need to weave in a few here, it will stay put nicely here.
Wash and shape. Push the nose up a bit to create a curve in the hat rim above
© 2023 Heather Pelletier – Handknit Hugs
This pattern is for personal, non-commercial use only.
Do not copy, re-distribute or sell this pattern either in whole or in part.
You may sell products made from this pattern – credit would be appreciated.
I hope you’ve this pattern. Please share your finished bottle toppers on Instagram or Ravelry, I would love to see them.
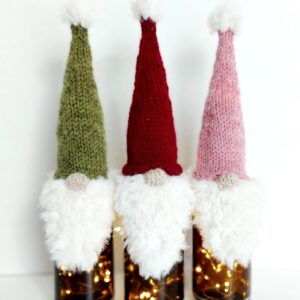
Tip: when the gifted bottle is empty these make a super cute Christmas decor item. Add a string of battery twinkle lights inside the clean, dry bottle and light them up.
Happy Holidays Everyone – Heather