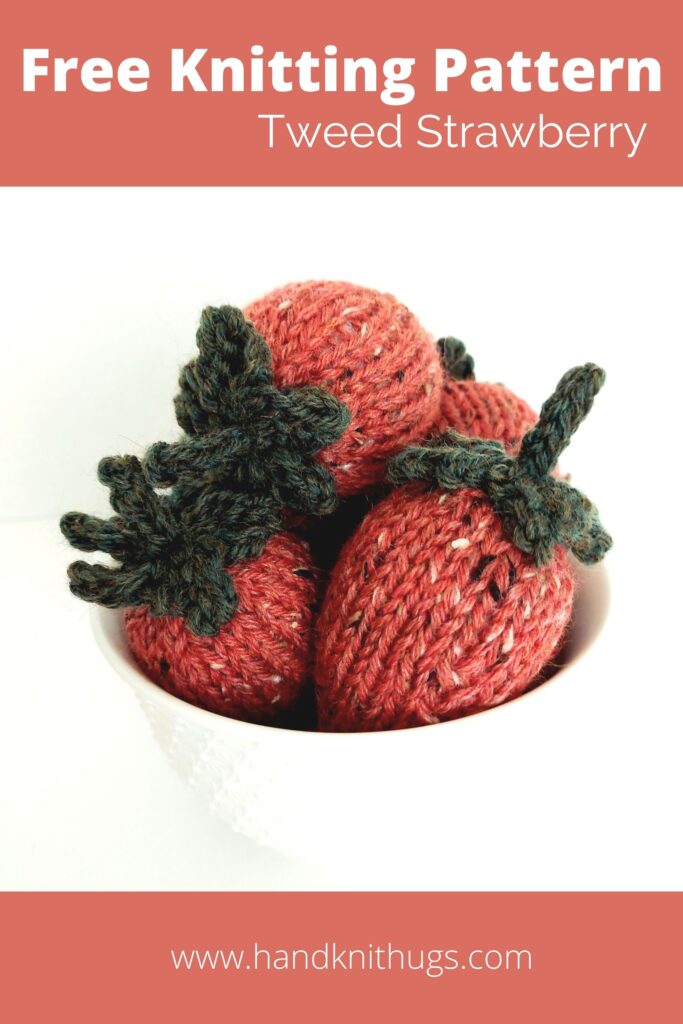
Tweed Strawberry Knitting Pattern
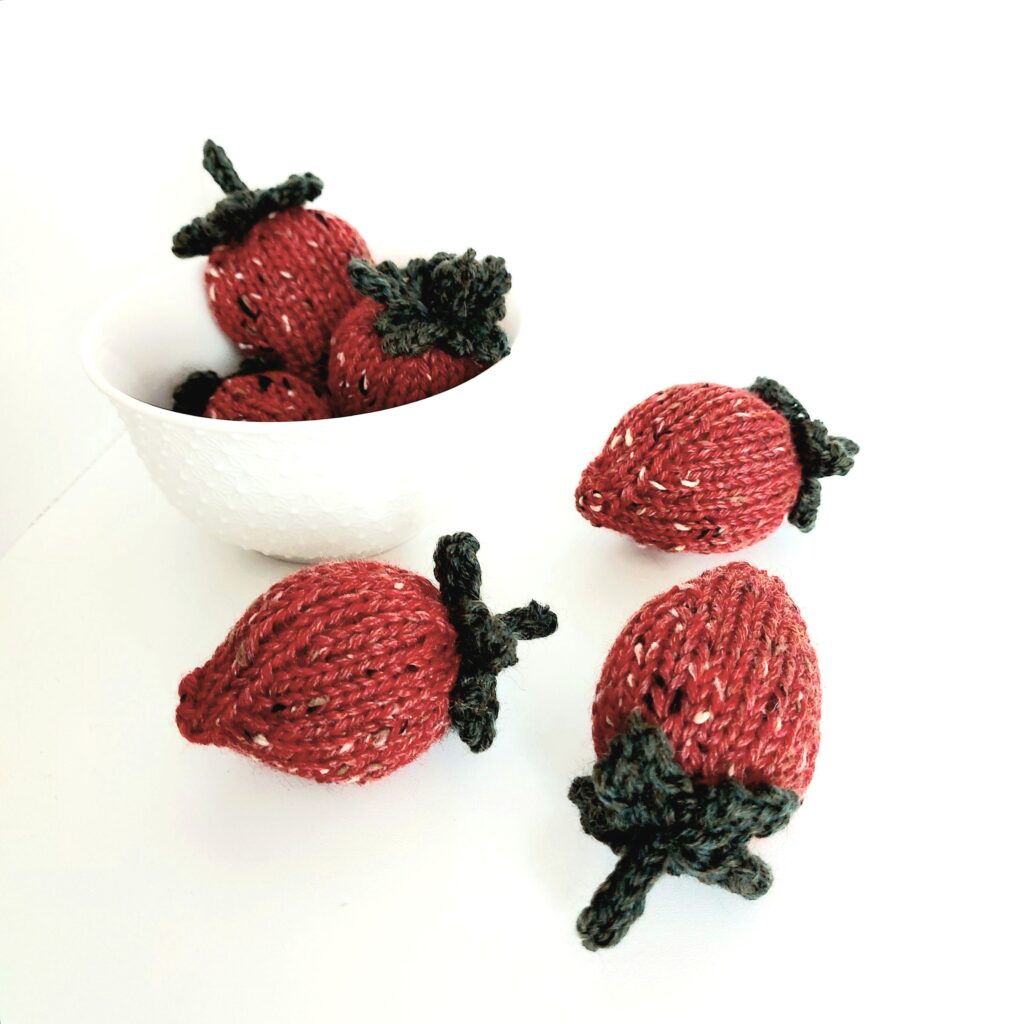
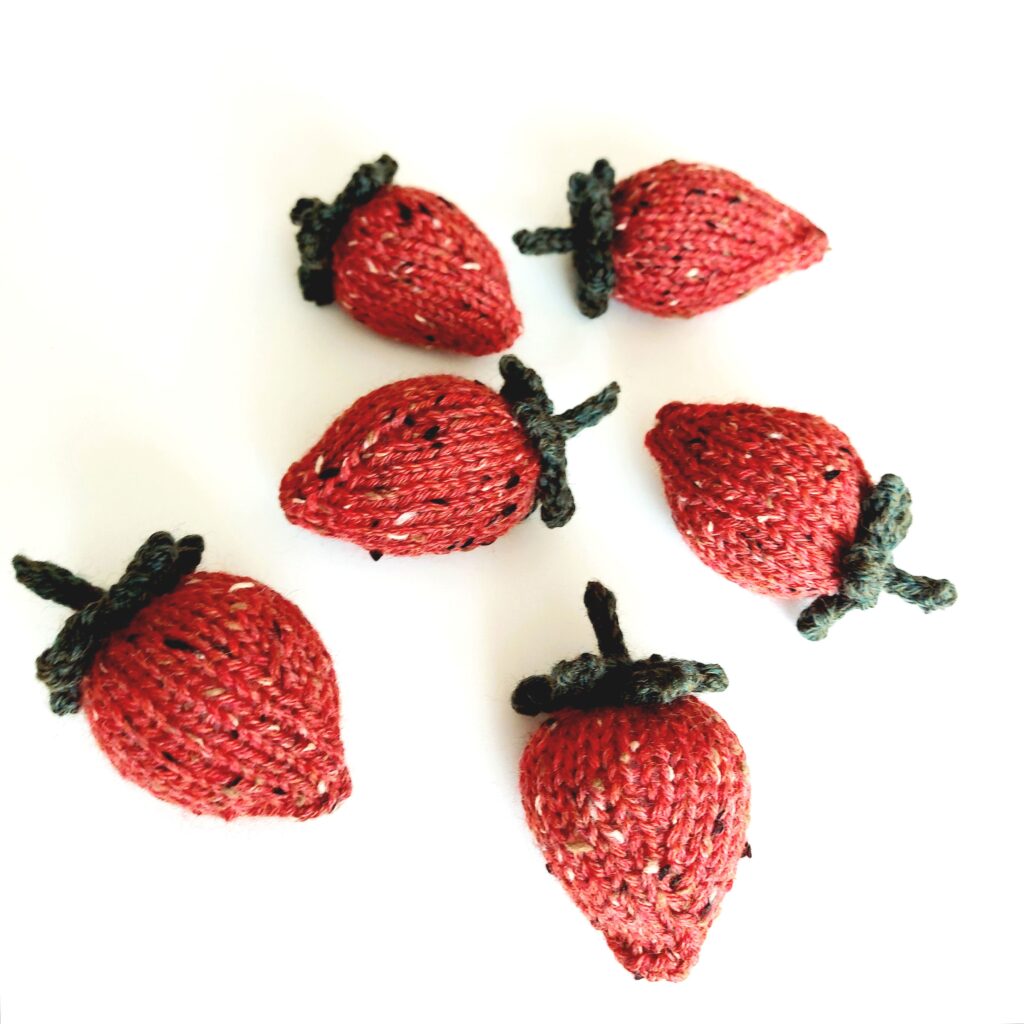
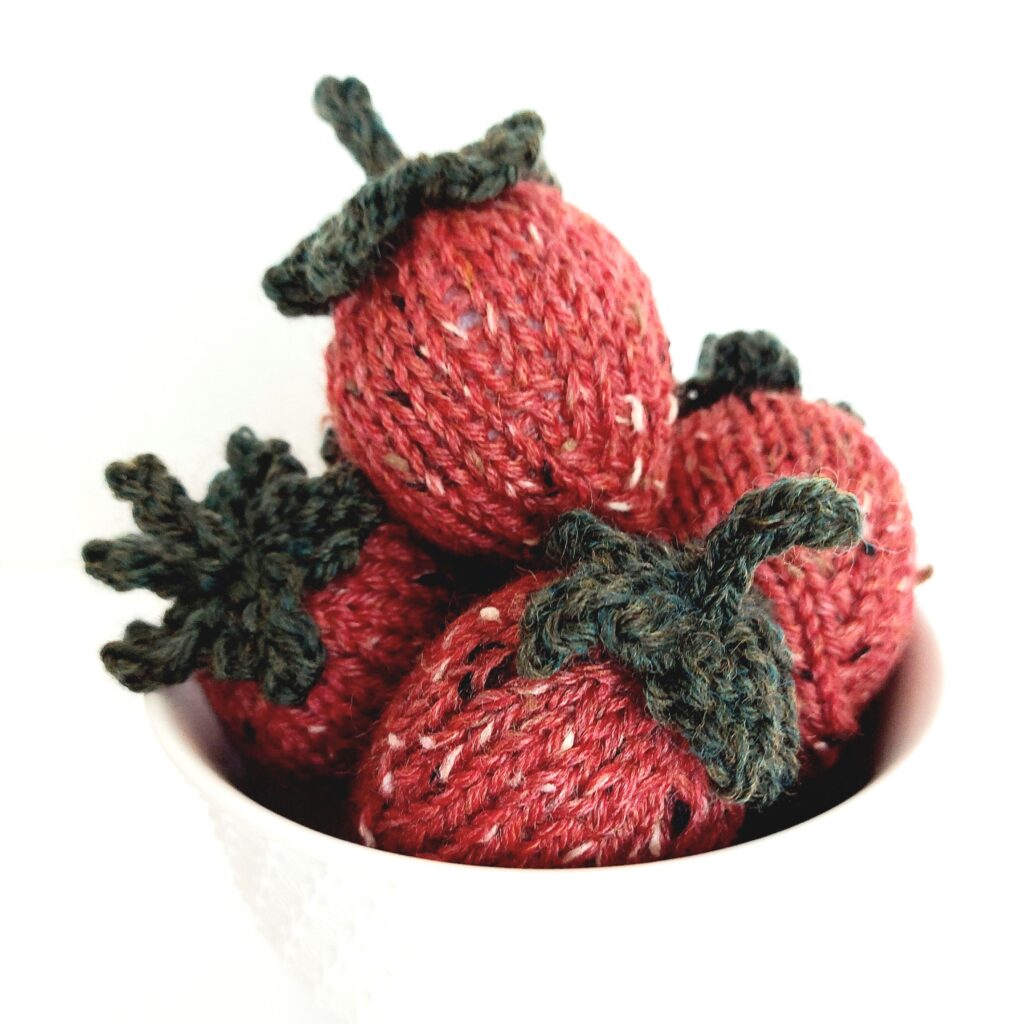
These cute little knit strawberries are perfect for summer decor. Add them to a garland or wreath when updating your porch for the season. Use them in a centerpiece or place setting at a summer BBQ or dessert table. These will also make an awesome addition to a child’s plush food collection.
These knit up super fast so you can make a bunch in no time. A red tweed yarn creates the look of the seeds without having to do the extra color work. The berry and stem are knit in the round in one piece on double point needles. The leaves are knit on straight needles in one continuous piece with no extra loose ends to weave in.
Affiliate Statement: Hey Readers, this post contains affiliate links. I may receive a small commission if you click and purchase from one of these links (which honestly, I’ll probably use to buy more yarn and design more awesome patterns to share with you). I only recommend products that I already use and love, thank you so much for your support.
I used Knit Picks Wool of the Andes Tweed (affiliate link) in the color Gingham Heather for the berry. It is a soft red colour, just a touch on the pink side, perfect for summer berries. The tweed flecks are black, white and brown, creating an earthy contrast perfect for the strawberry seeds. The stem and leaves are knit in Knit Picks Wool of the Andes (affiliate link) Shire Heather. It is a beautiful dark green with blue undertones and is an awesome topper to the red. Both yarns are a worsted weight wool.
The Pattern
Size
4″ (10cm) tall with stem
2″ (4cm) wide
Yarn and Materials
9 yards of red tweed in worsted weight wool for one strawberry
I used Knit Picks Wool of the Andes Tweed (affiliate link) in Gingham Heather
4 yards of green in worsted weight wool for the stem and leaves
I used Knit Picks Wool of the Andes (affiliate link)) in Shire Heather
Small amount of Poly-fil (a loose handful for each berry)
Needles and Tools
Set of US6 (4mm) double point needles
Darning Needle
Gauge
1” = 4.5 stitches worked in stocking stitch
Abbreviations
CO – Cast On
DPNs – Double point needles
K2tog – (Knit 2 together) Decrease one by knitting the next 2 stitches together
M1 – Make one stitch. For this pattern you will picking up and knitting a new stitch in the leg of the next stitch on the left hand needle. This is also called a RLI (Right Lifted Increase)
SSK – (Slip, slip, knit) Decrease 1 by slipping the next 2 stitches knitwise, slip the left needle through the front of both loops and knit them together
Instructions
Strawberry and Stem
CO 6 in red tweed color using US6 (4.0 mm) Double Point Needle
Knit to end and separate stitches across 3 DPNs, join round
Next Round – [K1, M1, K1] repeat to end
Repeat Round 1 – Knit to end
Repeat Round 2 – Knit to last stitch on the needle, M1, K1 – repeat to end of round
Repeat these 2 rounds until there are 7 stitches on each needle
Next Two Rounds – Knit to end
Next Round – Knit to last stitch on the needle, M1, K1 – repeat to end of round
Knit 6 rounds
Next Round – [K2, K2tog] repeat to end
Next Round – Knit to end
Stuff The Strawberry to your liking. I use a loose handful of Polyfil
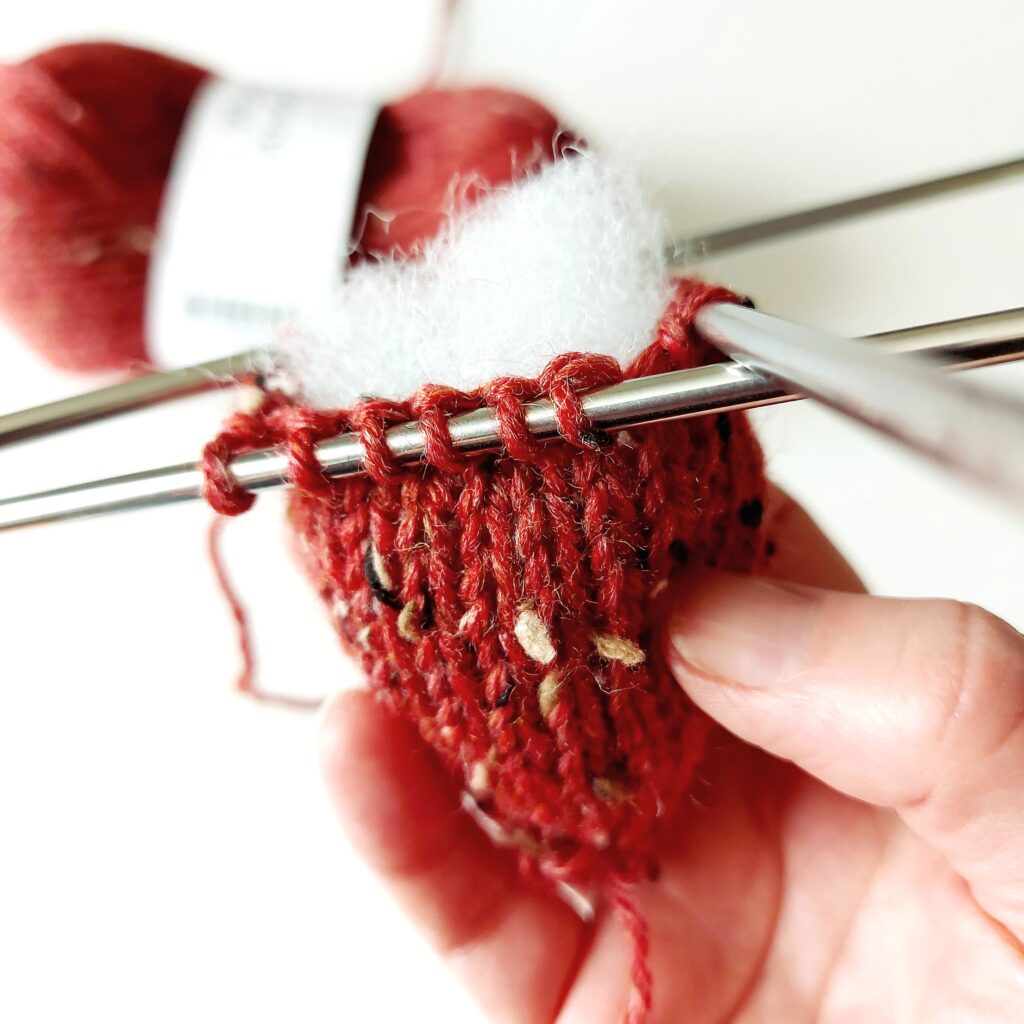
Switch to green stem/leaf colour
Next Round – [K1, K2tog] repeat to end
Stop here to tie off your loose ends of the colour change. I’m usually a ‘no knots in knitting’ kinda girl but go ahead and tie a double knot here and let the ends get lost in the stuffing
Next Round – [K2tog] repeat to end
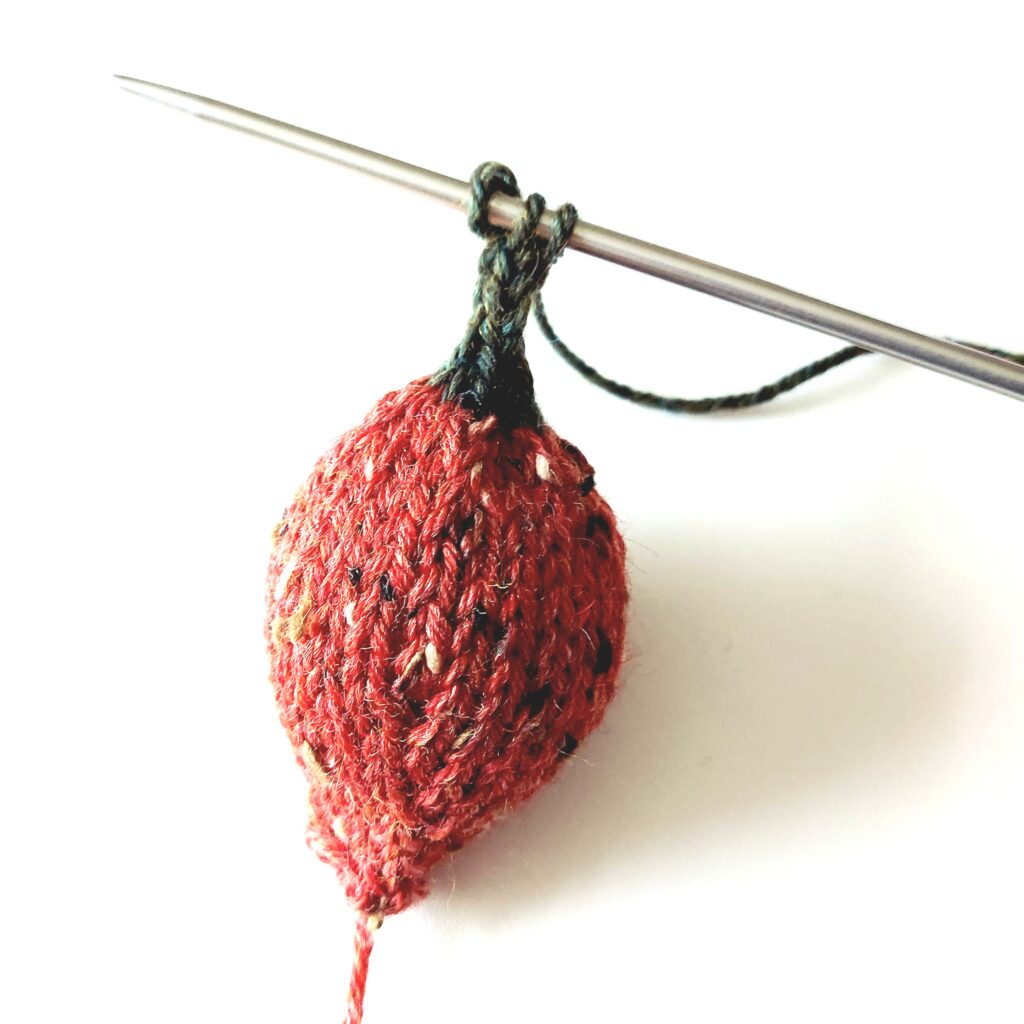
Next Round – Worked onto 1 needle: [K2tog] repeat to end (3 stitches remain)
Slide the stitches to the opposite end of the needle to begin knitting a cord for the stem
K3, slide stitches to end the opposite end of the needle – repeat 4 times
Cut yarn – run yarn through the remaining stitches with a darning needle, run down the center of the stem and into the berry.
Use the Cast On tail to close up the hole at the bottom of the berry. Sew a couple stitches to secure and run the loose thread into the berry
Leaves
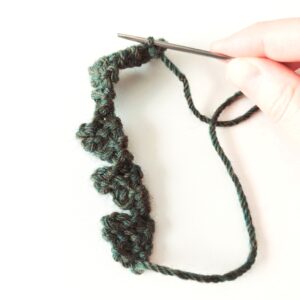
Using US6 (4.0mm) straight needles or 2 DPNs
CO 5 with green stem/leaf colour
Row 1 – knit (Right Side)
Row 2 – K3, K2tog
Row 3 – knit
Row 4 – K2, K2tog
Row 5 – SSK, K1
Row 6 – K2tog
Row 7 – make sure you turn so the right side is facing, CO on 4
Repeat Rows 1-7 three more times then Rows 1-5 once for five points/leaves
Bind off last 2 stitches leaving a tail about 6” long when cutting the yarn.
Using a darning needle, run the bind off yarn through the top of each of the garter stitch ribs starting with the first knit leaf and continuing through to the last. This will create a small circle.

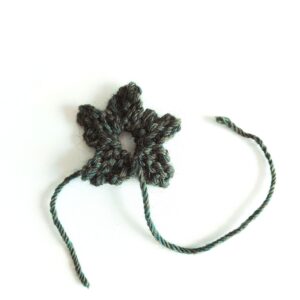
Place the leaves over the stem and pull the yarn tight and tie to the cast on tail. Continuing with the bind off tail, sew a stitch at the base of each leaf to the berry. Sew a couple more stitches to secure and run the remaining thread into the center of the berry.
© 2022 Heather Pelletier – Handknit Hugs
This pattern is for personal, non-commercial use only.
Do not copy, re-distribute or sell this pattern either in whole or in part.
You may sell products made from this pattern – credit would be appreciated.
Thank you so much for checking out this pattern, I hope you have enjoyed it. If you want to support me all you have to do is share. Please comment at the bottom of this post if you have any questions or feedback. I would love to see your finished strawberries, share your project on Ravelry or post a photo on Instagram and tag @handknithugs #hkhtweedstrawberry