Free Knitting Pattern
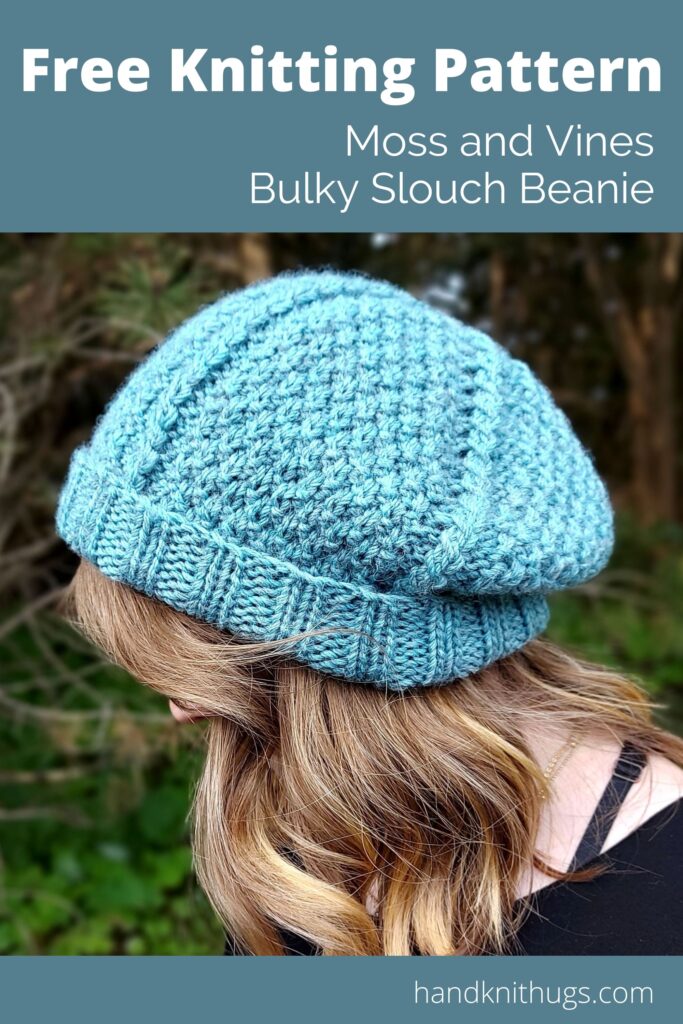
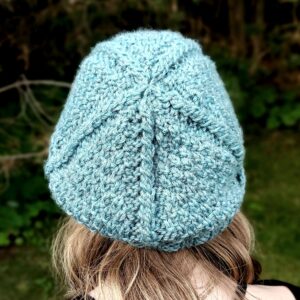
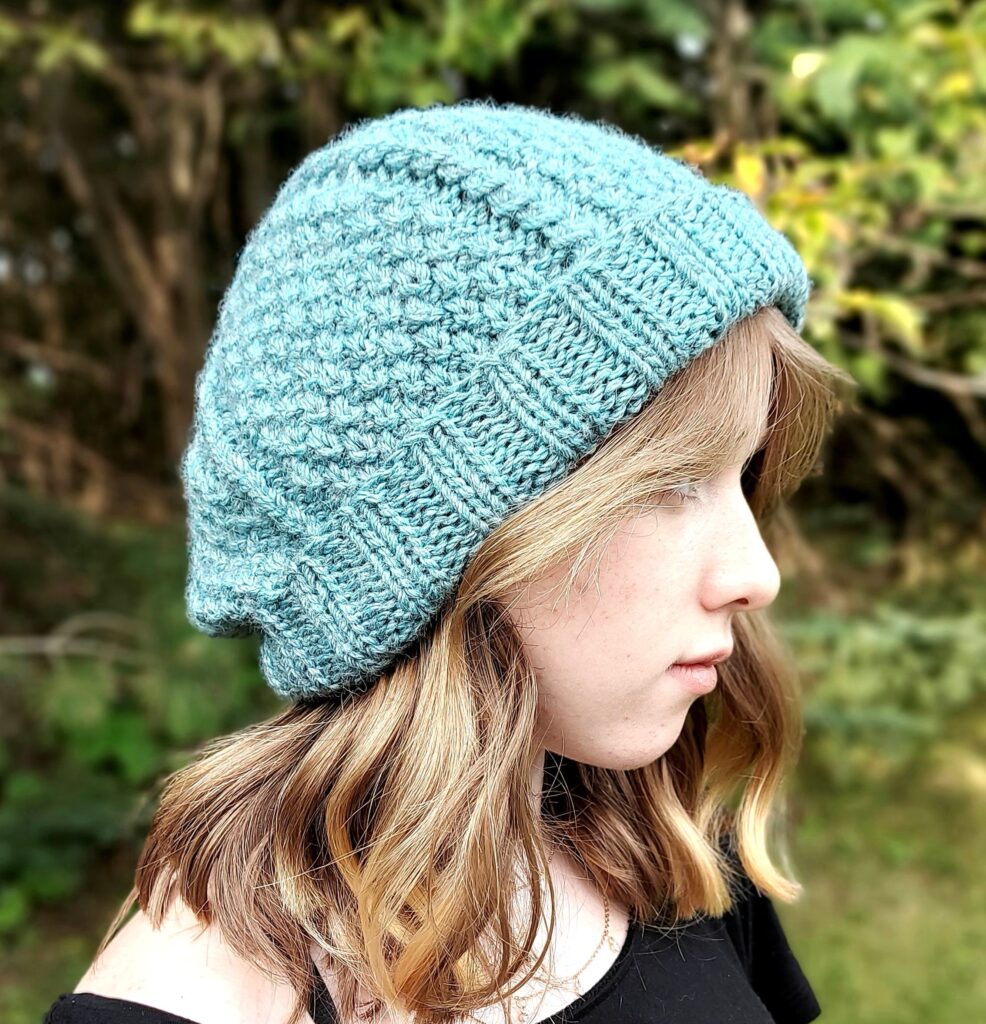
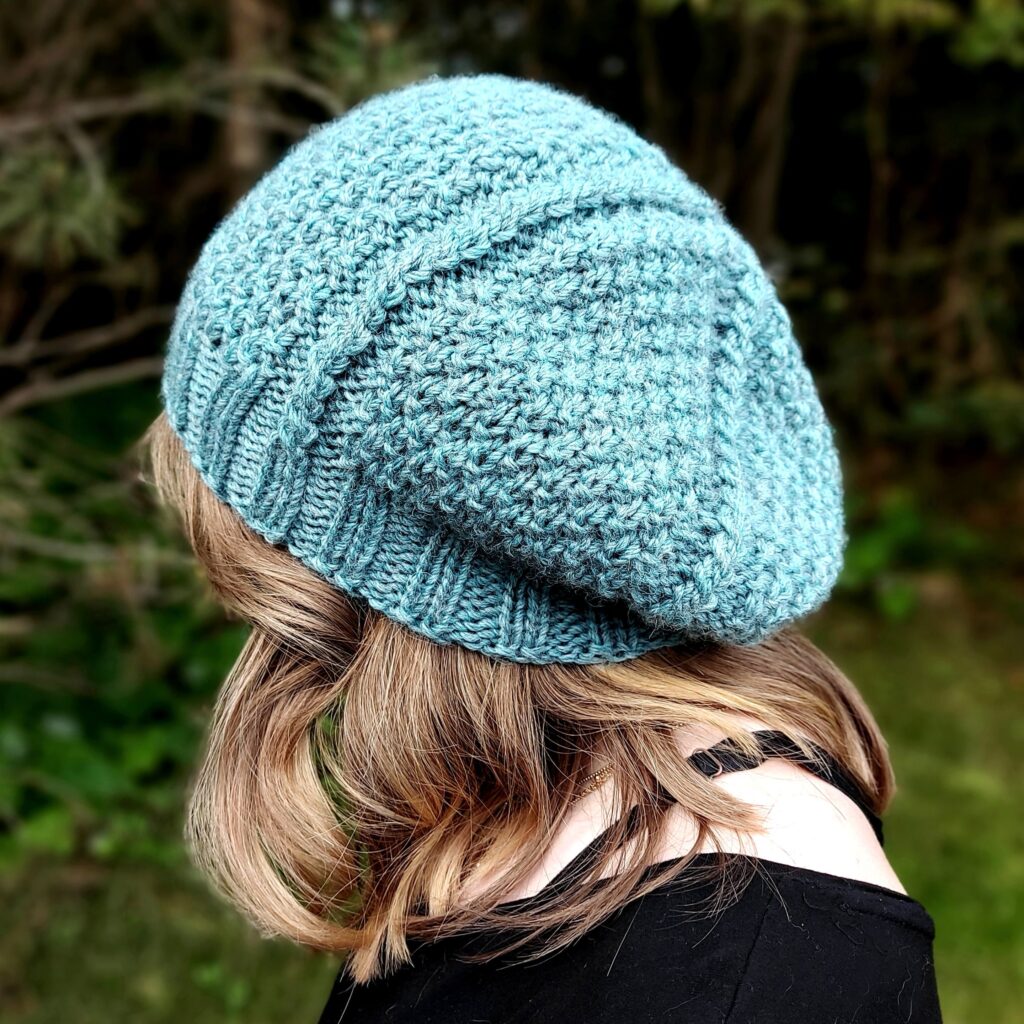
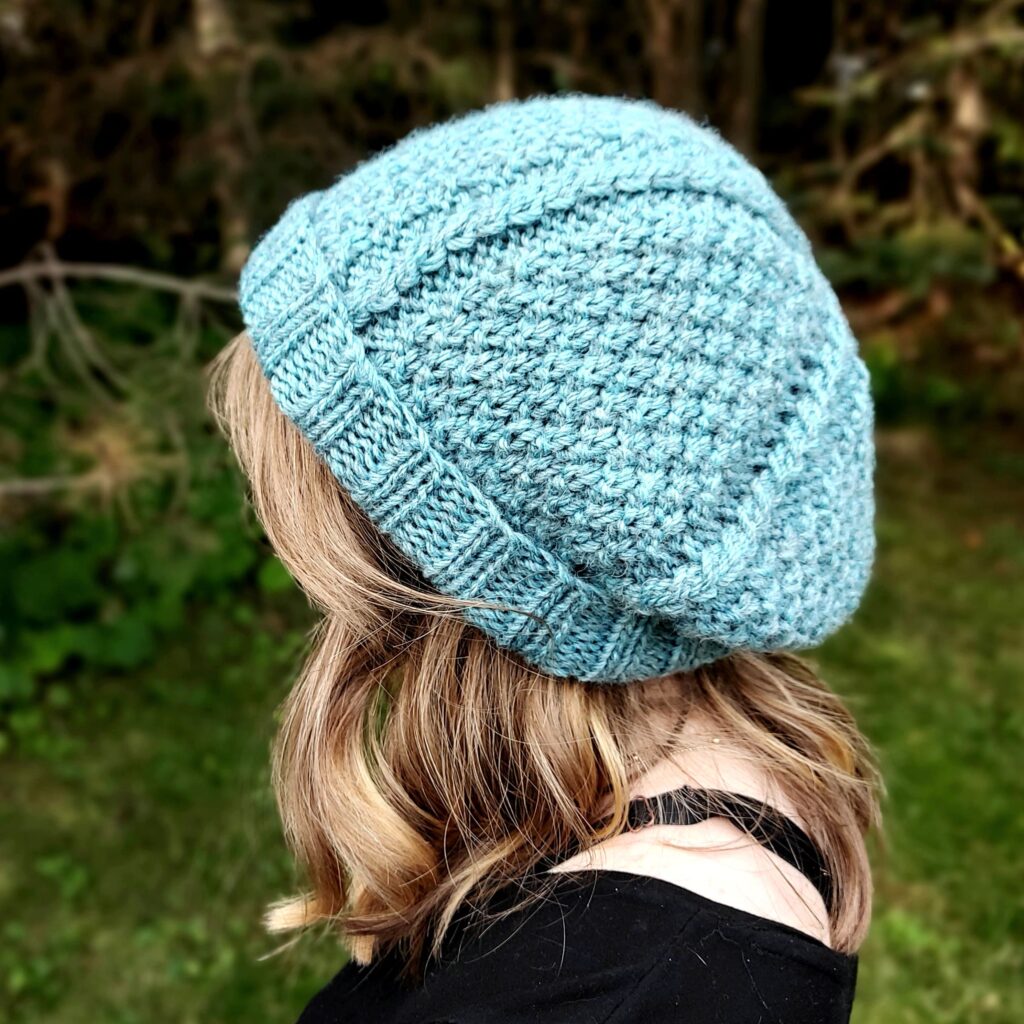
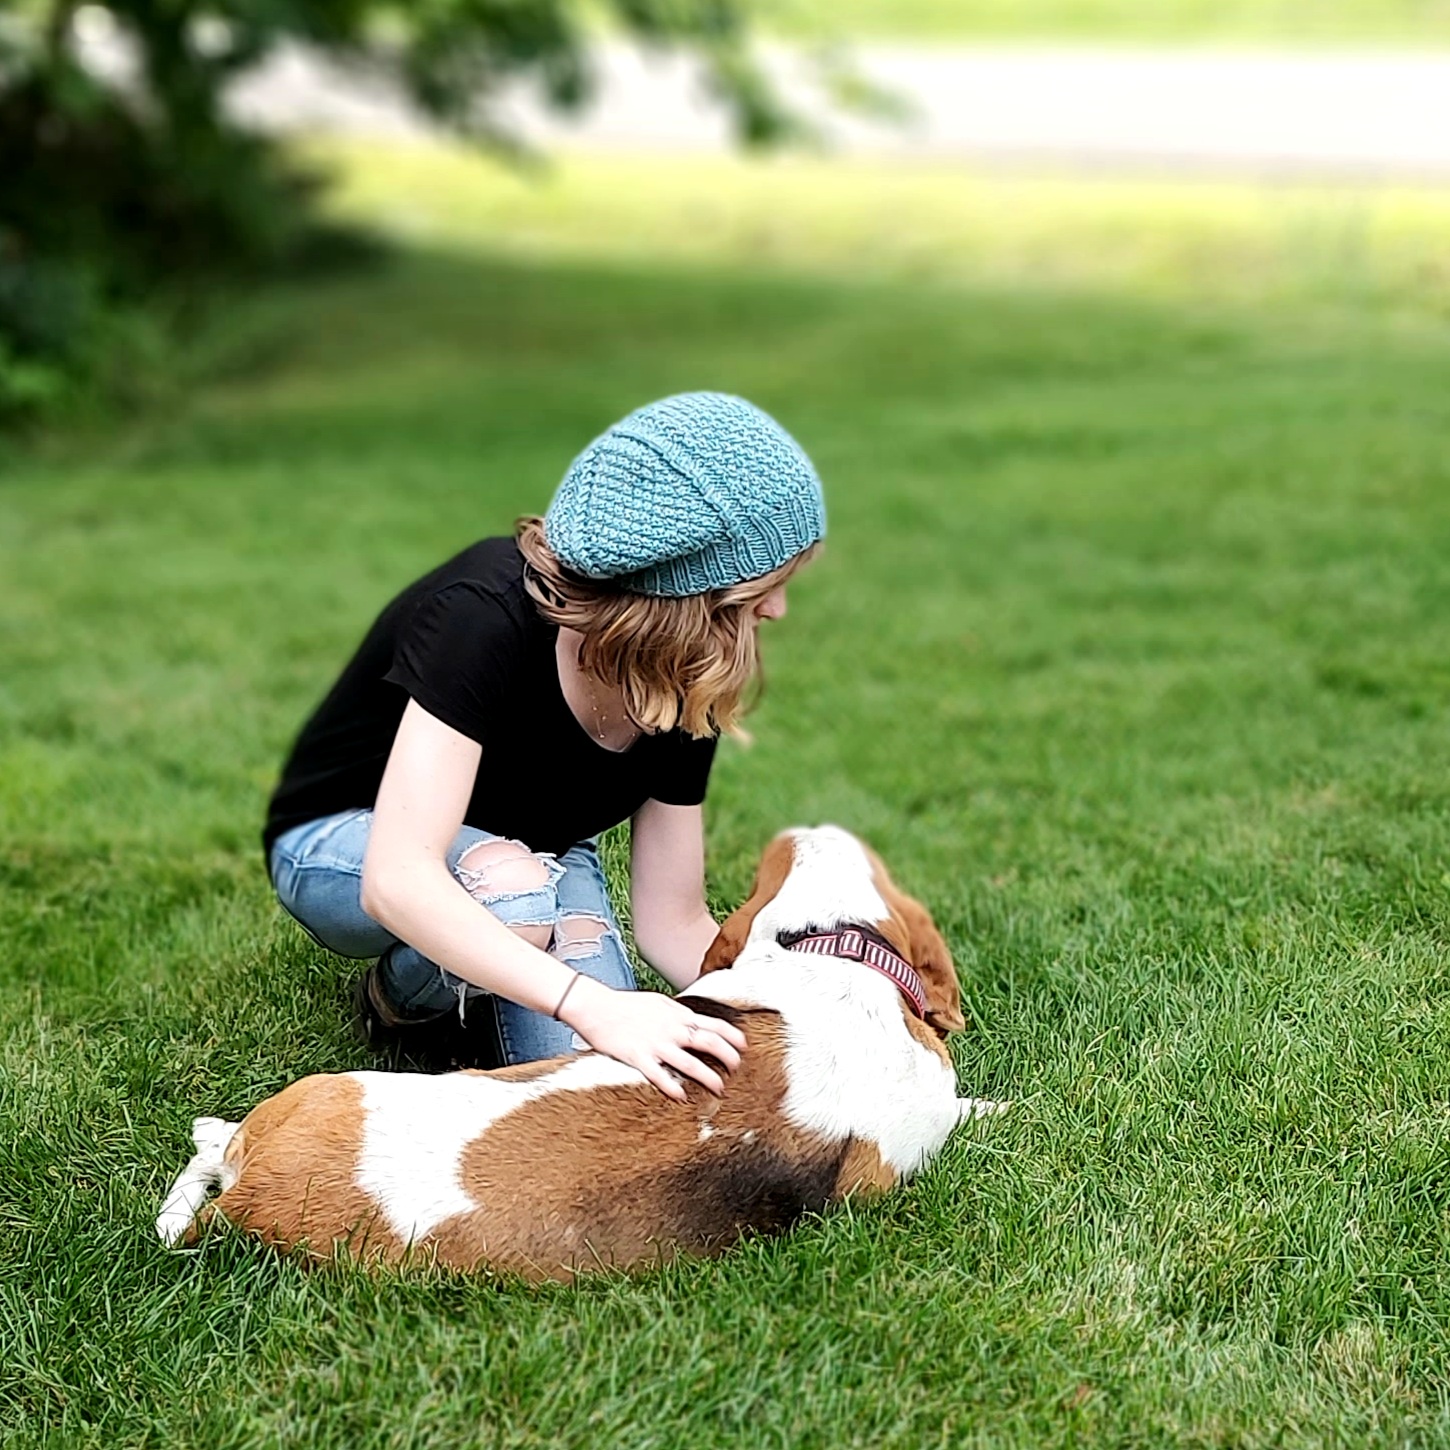
If you are looking for a fun slouchy beanie with loads of texture this one is for you. Five panels of Irish moss, framed with vines of twist left, mock cable stitches, come together to form a cool starfish pattern at the crown of the hat.
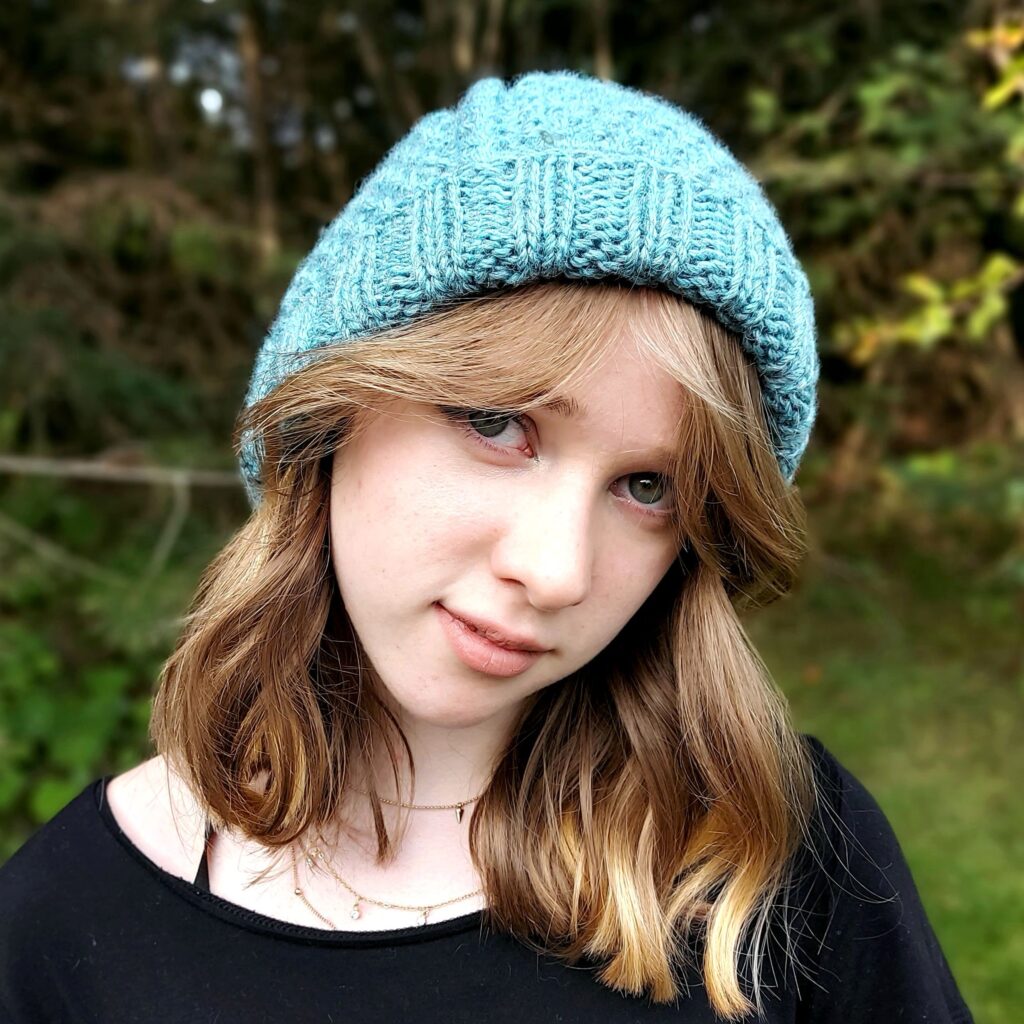
I like this one with a folded rim, it gives ears a little extra warmth and has a really nice round shape. But, you can also unfold the rim for a beret style beanie with an awesome slouch in the back. If you prefer no fold and less slouch you can work 5 repeats of the moss stitch panels instead of 6. The pattern starts with a tighter gauge for the rim before switching up to larger needles and a few increases for the slouchy style mushroom shape.
Affiliate Statement: Hey Readers, the following post contains affiliate links. I may receive a small commission if you click and purchase from one of these links (which honestly, I’ll probably use to buy more yarn and design more awesome patterns to share with you). I only recommend products that I already use and love, thank you so much for your support.
I used Knit Picks Wool of the Andes Bulky Superwash (affiliate link – see statement above), the beanie knits up with less than one skein. It is not as thick as other bulky yarns but still has a really nice weight to it. It seems to be in between a bulky and an aran yarn.
The colourway is Fjord Heather and is absolutely gorgeous. It is a light aqua blue that is muted with undertones of charcoal gray. I was saving this wool for something with lots of texture and I am so happy with the way it turned out. The stitch definition is beautiful.
The Pattern
Yarn
Wool of the Andes Bulky Superwash in Fjord Heather
(affiliate link – see statement above)
You will need 1 hank, 137 yards
Needles and Tools
US 8 (5 mm) 16″ circular knitting needle
US 10 (6 mm) 16″ circular knitting needle
US 10 (6 mm) Double Point Needles
Stitch Marker (optional, 4 more stitch markers to mark panels)
Darning Needle
Gauge
4″ (10cm) = 16 stitches and 22 rows on US10 (6mm) needles in moss stitch
Size
Circumference 22-24″ (56cm -61cm)
Length 8.5″ (21.5cm) folded, 10″ (25.5cm) unfolded
Abbreviations
CO – Cast On
DPNs – Double Point Needles
K2tog – (knit 2 together) Decrease one by knitting the next 2 stitches together
KFB – (Knit front and back) Increase one by knitting into the front and back of the next stitch
P2tog – (Purl 2 together) Decrease one by purling the next 2 stitches together
SSP – (Slip slip purl) Decrease 1 by slipping the next 2 stitches knitwise, return these stitches to the left-hand needle then purl them together through the back loops
TL – (Twist Left) knit into the back of the 2nd stitch on the left-hand hand needle then knit into the front of the first stitch, slide both stitches off
Instructions
CO 80 with US 8 (5mm) circular needle
[P2, K2] repeat to end, place marker and join round
Work 11 rounds of P2, K2 ribbing
Increase Round: [[P2, [K1, KFB] x5, P2, TL]]
Switch to US10 (6mm) circular needle
Round 1: [[P2, [K1, P1] x7, K1, P2, K2]] repeat to end
Optional – place a marker at the end of every repeat to mark panels. You can remove in a few rounds once the panels are established
Round 2: [[P2, [K1, P1]x7, K1, P2, TL]] repeat to end
Round 3: [[P2, [P1, K1] x7, P3, K2]] repeat to end
Round 4: [[P2, [P1, K1] x7, P3, TL]] repeat to end
Repeat these 4 rounds 6 times (total of 24 rounds)
Begin decrease rounds – switch to DPNs when needed
Next Round: [[P1, P2tog, [P1, K1] x6, P1, SSP, P1, K2]] repeat to end
Next Round: [[P2, [P1, K1] x6, P3, TL]] repeat to end
Next Round: [[P1, P2tog, [P1, K1] x5, P1, SSP, P1, K2]] repeat to end
Next Round: [[P2, [P1, K1] x5, P3, TL]] repeat to end
Next Round: [[P1, P2tog, [P1, K1] x4, P1, SSP, P1, K2]] repeat to end
Next Round: [[P2, [P1, K1] x4, P3, TL]] repeat to end
Next Round: [[P1, P2tog, [P1, K1] x3, P1, SSP, P1, K2]] repeat to end
Next Round: [[P2, [P1, K1] x3, P3, TL]] repeat to end
Next Round: [[P1, P2tog, [P1, K1] x2, P1, SSP, P1, K2]] repeat to end
Next Round: [[P2, [P1, K1] x2, P3, TL]] repeat to end
Next Round: [P1, P2tog, P1, K1, P1, SSP, P1, K2] repeat to end
Next Round: [P3, K1, P3, TL] repeat to end
Next Round: [P1, P2tog, P1, SSP, P1, K2] repeat to end
Next Round: [P1, P2tog, P2, TL] repeat to end
Next Round: [P2tog, SSP, K2] repeat to end
Next Round: [P2tog, K2tog] repeat to end
Cut yarn and run it through the remaining stitches and into the center of the hat with a darning needle. Sew a couple stitches on the inside to avoid getting a hole.
Weave in loose ends
Wash and Block
Wear and enjoy
© 2021 Heather Pelletier – Handknit Hugs
Do not copy, re-distribute or sell this pattern either in whole or in part.
You may sell products made from this pattern – credit would be appreciated.
I would love to see your finished beanie. Share your project on Ravelry or tag me on Instagram @handknithugs #mossandvinesbeanie
Thank you for checking out this free pattern, I hope you have enjoyed it. If you like it you can support me just by sharing. Thanks so much! Heather